Hunyuan3D 3.1 Pro vs Rapid: GLB, OBJ, and Cost
Hunyuan3D 3.1 Pro vs Rapid on the same image. See the measured mesh sizes, triangle counts, actual charges, and three rendered views.
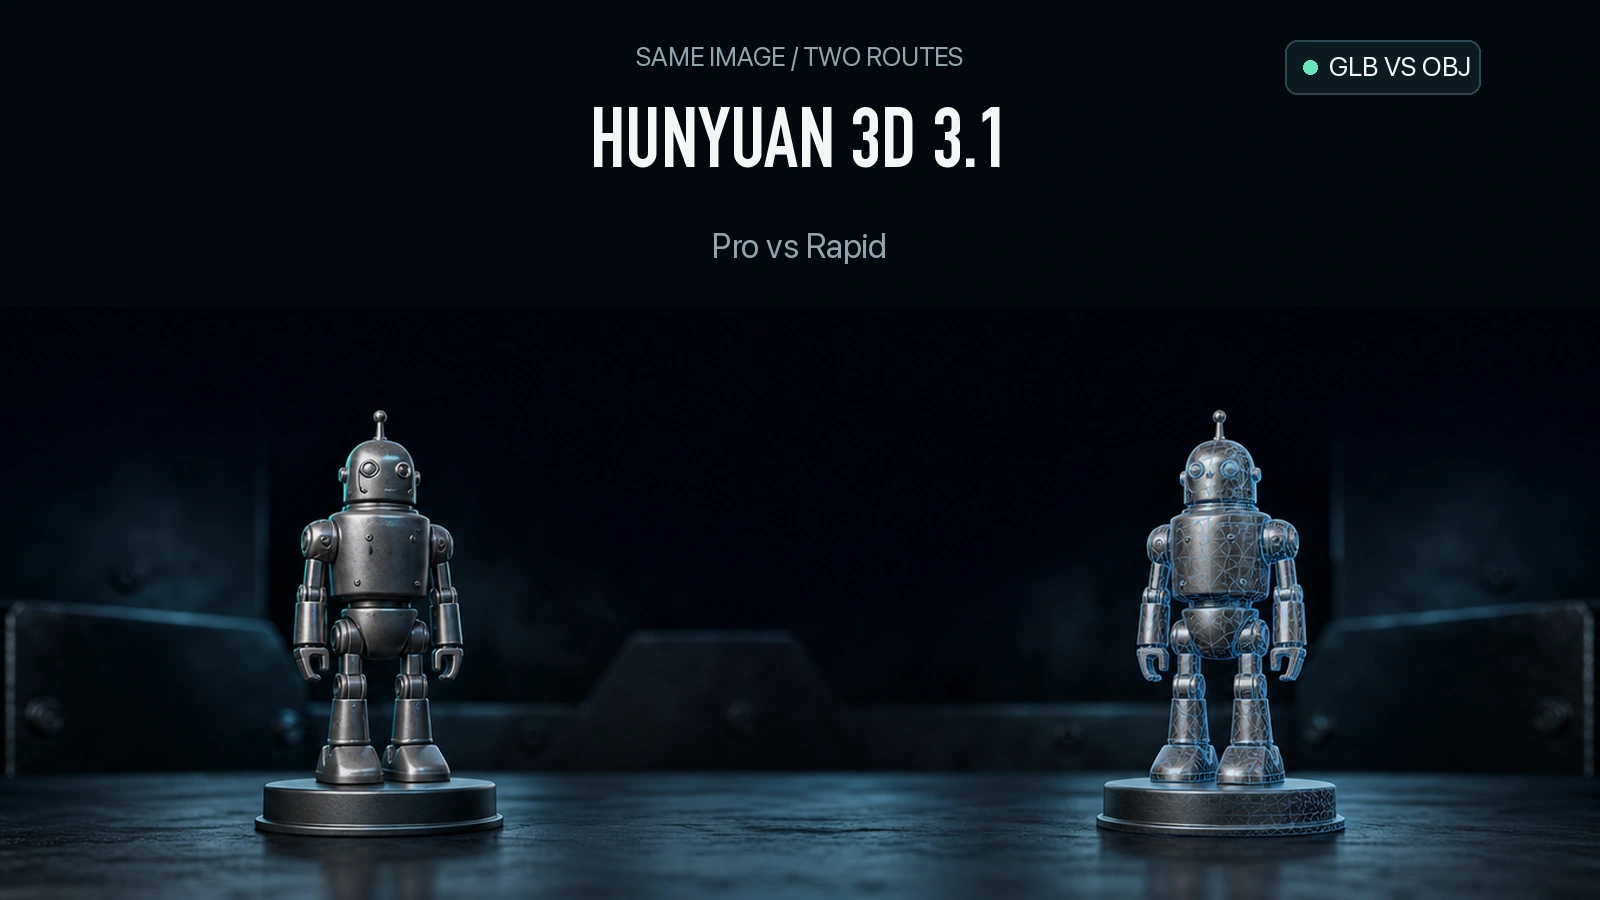
If your product viewer already loads GLB, Hunyuan3D 3.1 Pro delivered the simpler file to ingest in this test. Rapid delivered an OBJ plus a material file and a separate texture. Both reconstructed a recognizable robot from the same front image, but they made different choices about the ears, waist and backs of the knees. For an integration, the choice starts with the files your application can accept and the detail your users will actually see.
Key takeaway
- A single textured run on November 14, 2026, cost $0.270 on Rapid and $0.375 on Pro through SandBase.
- Rapid returned OBJ, MTL and PNG. Pro returned GLB. These are the observed files for the tested configuration.
- The outputs had 50,000 and 499,914 triangles respectively. Only one front image was used.
- For a GLB-first application, start by testing Pro’s loading and transfer budget. For an OBJ pipeline, test Rapid with its material and texture files.
What we tested
On November 14, 2026, one request was submitted to each route through SandBase. Both received the same 1024 × 1024 public robot image from the Rapid model page. Both requests used textured output with PBR disabled, no custom face count and no additional views. The test shows the two routes’ default deliveries under a shared input, with each route free to use its own default mesh density. Pro also exposes optional view fields and a target face count for a separate, controlled comparison. Pro parameters · Rapid parameters

Both requests used this front image. The waist, eyes and front joints are visible. The side and rear had no independent reference.
The robot has a clear background, a roughly symmetrical silhouette and colored features that make the results easy to inspect. For a product reproduction test, add an asymmetrical object with a one-sided attachment, lettering or a recess. Photograph its sides and back, then reserve some views for inspection. Otherwise there is no reference for judging how faithfully a front-image model reconstructs the hidden surfaces.
Delivered files and actual charges
| Measurement | Rapid | Pro |
|---|---|---|
| Result | Completed | Completed |
| Actual charge | $0.270 | $0.375 |
| Delivered assets | OBJ + MTL + PNG | GLB |
| Total asset bytes | 14,494,820 | 31,932,256 |
| Triangles | 50,000 | 499,914 |
| Browser render | OBJ with material and texture | glTF loader |
| glTF Validator | OBJ inspected separately | 0 errors, 0 warnings |
The Rapid package contains a 3,168,367-byte OBJ, an 88-byte MTL and an 11,326,365-byte PNG. The texture accounts for most of the bytes, so the OBJ size on its own understates the size of the asset your viewer needs. Pro’s GLB has one mesh, one material and one embedded image. Preview thumbnails are excluded from both totals. The OBJ triangle total comes from the face records, and the GLB count comes from its triangle primitives. The two charges totaled $0.645. The run receipt records the submission time. A reliable completion time was unavailable, so this comparison omits speed.
Rapid’s response listed the main file with an application/x-tgif content type. The extension and file contents identified it as an OBJ. The same result also included separate mtl and texture fields. That detail matters if you are routing jobs into a renderer. Inspect the actual content before assigning a file extension or choosing a loader. For OBJ, preserve the references from the mesh to the material and from the material to the image. If you rename or relocate a file, update its reference or configure the loader to resolve it.
What the three views reveal
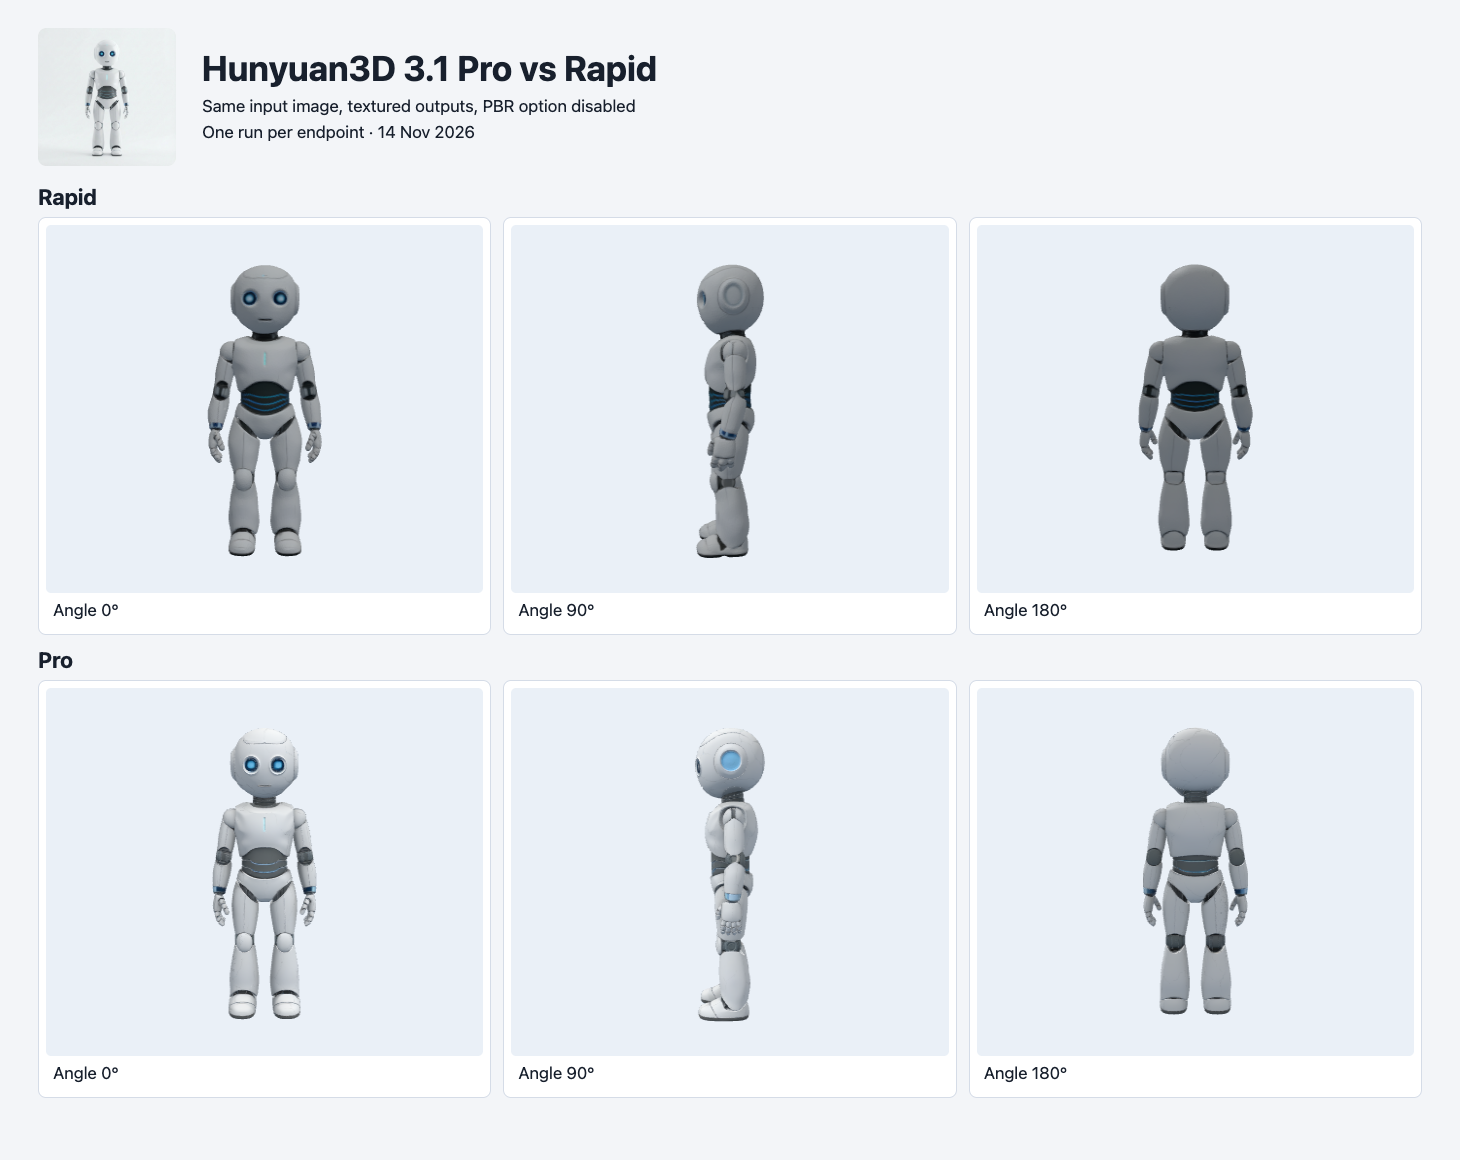
The two meshes share the same camera, lighting and background. Each asset was normalized to the same longest bounding-box dimension. The images support shape comparison; they do not show real-world size.
Both results retain the large eyes, chest plate, waist and distinct limb sections. The Rapid result looks darker in this rendering and has more prominent blue stripes around the waist. Pro renders the face, chest and toes brighter and fills the side ring with blue. In the back views, the darker areas around the hips and knees differ. Those are visible differences between these outputs. Side and rear reference photos would be needed to determine which is closer to the source object. Apparent brightness also depends on how the two loaders interpret materials and normals.
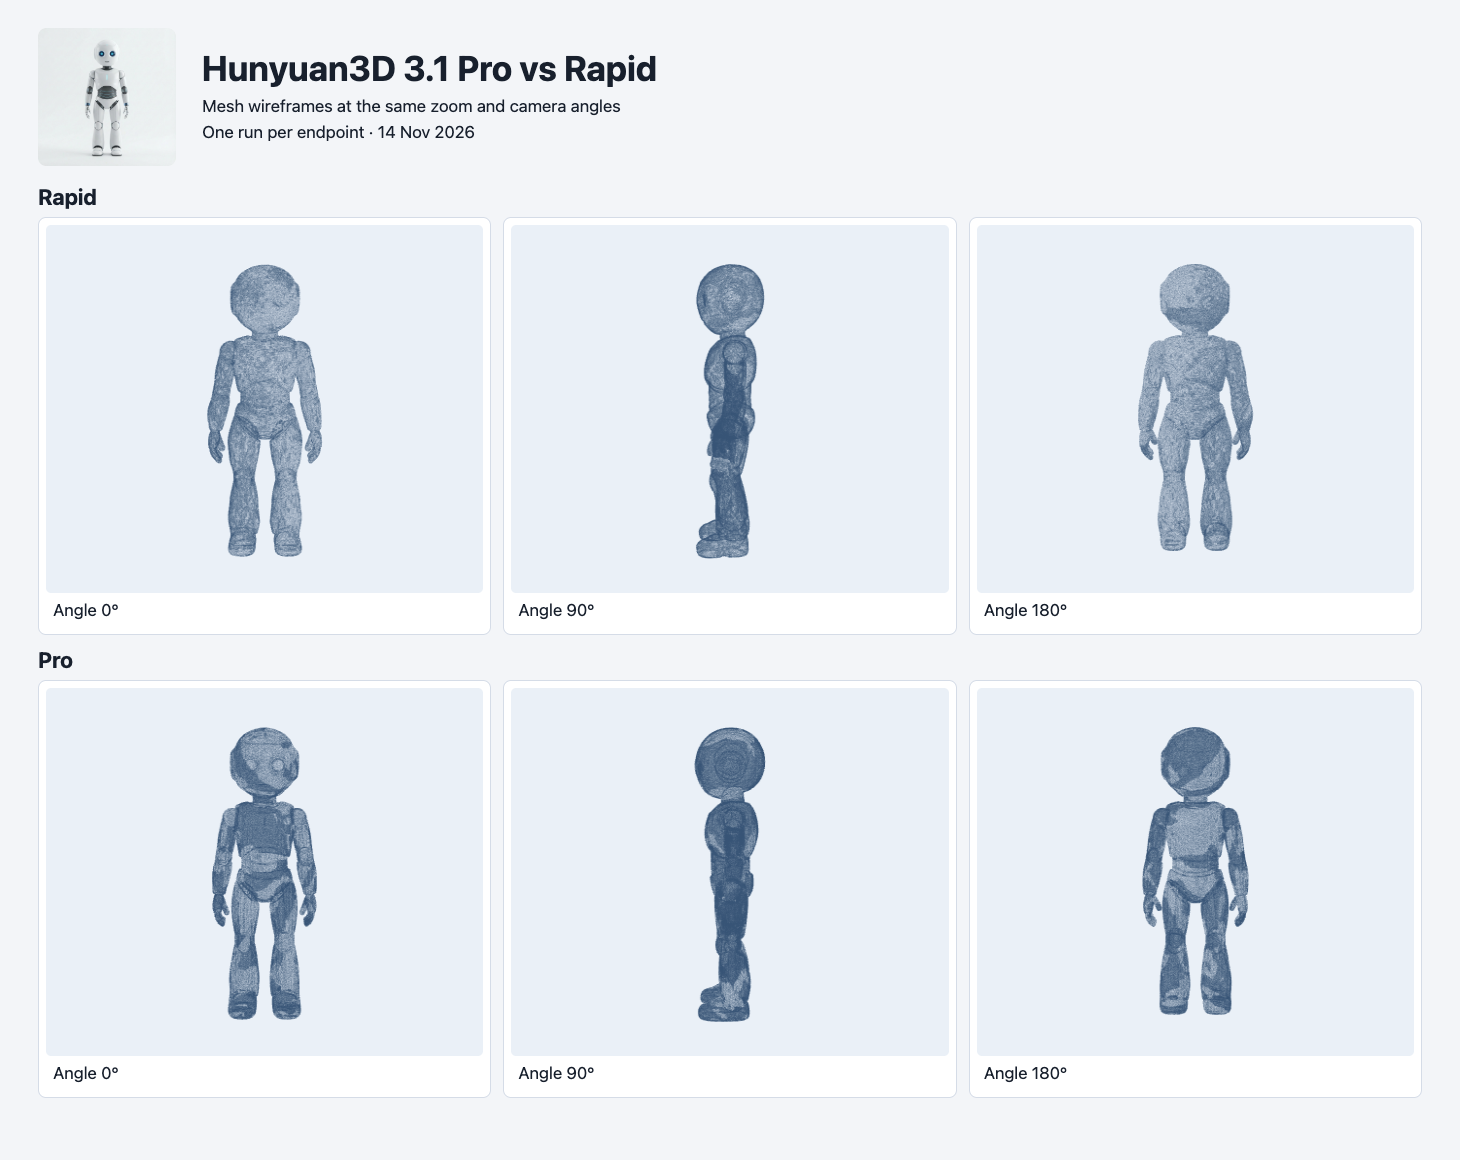
The wireframe view exposes the density difference at the same display scale. Pro delivered nearly ten times as many triangles in these two default runs.
At thumbnail size, the front silhouettes are close. Looking at the side reveals differences around the head ring, toes and hands that are less obvious in a front-only preview. Start by checking the asset at the size users will see it. For a small catalog thumbnail, the extra geometry may have little visible effect. If users can rotate and zoom, inspect features from the angles they will explore and test how much detail survives compression or simplification.
What the 3.1 options change
The model pages expose a similar starting point. Each accepts a front image by URL. The route-specific field description lists JPG, PNG or WebP, 128–5,000 pixels and an 8 MB limit. The generic uploader lists a larger upload limit, so use the model field limits when validating jobs. Resize a source image once before sending it to both routes, and retain that exact input. Differences introduced by an image resize can otherwise be hard to distinguish from differences in the generated shape.
| Documented option on SandBase | Rapid | Pro |
|---|---|---|
| Required input | Front image | Front image |
| Extra views | Single-view route | Up to seven additional view fields |
| Geometry-only mode | enable_geometry | generate_type: Geometry |
| Material option | enable_pbr | enable_pbr |
| Custom face target | No field listed | 40,000–1,500,000 target, billed add-on |
| Standard textured request with PBR off | $0.270 | $0.375 |
| Additional settings that affect billing | PBR option | PBR, custom faces, additional views |
| Delivery in the dated test | OBJ with sidecars | GLB with embedded image |
A useful second experiment sets the Pro face target close to the observed Rapid count. That holds the output budget closer while exposing whether the same details survive. A separate multiview experiment can answer the reconstruction question by supplying a side view and withholding the rear image. Keep those questions in separate runs. The dense Pro result shown here combines a different endpoint and a much larger mesh, so it cannot isolate the effect of the model itself.
Budget for the asset you will actually use
At the observed settings, 100 completed outputs would cost $27.00 on Rapid or $37.50 on Pro if the charge stayed the same for every request. This calculation includes API charges only. Use the current model pages to price other settings. A custom face target or an additional view can change the Pro charge, and the PBR setting can change the charge on either route.
For a catalog, include how many outputs pass review. A hypothetical batch of 100 Rapid requests with 80 accepted outputs works out to $0.3375 in API charges per accepted asset. With 90 accepted Pro outputs the same calculation is about $0.4167. The acceptance counts are examples. Replace them with the number of assets that pass your own checks for file size, silhouette, material and loading. A batch report can then show where the spending goes: generation, a repeat submission, or a separate downstream operation.
Measure cleanup separately. An OBJ that needs a one-time loader adjustment can make sense for an existing OBJ pipeline. If the app requires GLB everywhere, the conversion needs its own check for texture references, orientation and scale. The Pro file still needs a transfer budget, especially if several products appear in one view. Downloading a result and rendering a small screenshot validates the asset path used in this test. Time the load on the device and connection your readers care about before committing to a page budget.
Reproduce the two requests
Keep your SandBase key in a server-side environment variable. The loop submits the same inputs used here. Save each returned run ID and poll GET /v1/run/{id} for the terminal state. After completion, inspect the returned files before downloading them. Record the time at both submission and completion if you want to compare speed.
IMAGE_URL='https://static.sandbase.ai/examples/tencent/hunyuan-3d/3.1/rapid/image-to-3d/input_image_0.png'
for variant in rapid pro; do
  jq -n --arg image "$IMAGE_URL" \
    --arg model "tencent/hunyuan-3d/3.1/$variant/image-to-3d" \
    '{model:$model,image:$image,enable_pbr:false}' |
  curl --fail-with-body -sS https://api.sandbase.ai/v1/run \
    -H "Authorization: Bearer $SANDBASE_API_KEY" \
    -H 'Content-Type: application/json' --data-binary @-
  printf '\n'
done
For an automated asset check, route by the verified file format after the job completes. Check the GLB header and run Khronos glTF Validator, then render in the same browser loader used by your application. For OBJ, check face records, material references and texture availability before rendering. Save front, side and rear views with the same camera and normalized bounds. Record failed renders and assets that miss your size budget alongside the passing samples. They affect the number of acceptable assets you can produce for a given spend. Khronos glTF Validator
Choose a route for the next step
- A web viewer expects one self-contained GLB. Start by testing Pro. This GLB passed validation and loaded in the browser, but it weighed about 31.9 MB. Check loading on a mobile connection and evaluate how much simplification and texture compression your asset can tolerate.
- Your pipeline already ingests OBJ or converts it to GLB. Test Rapid. This output totaled about 14.5 MB and had 50,000 triangles. Keep the material and texture with the mesh, then validate the converted result before deciding which route costs less to deliver.
- The product has ports, labels or an asymmetric back. Test Pro with additional views and hold back some reference photos for inspection. Compare placement and shape against the reference rather than judging by the front silhouette alone.
- The asset must animate or go to a printer. Add task-specific checks. Test skeleton binding and joint deformation for animation. For printing, inspect closed surfaces, dimensions and wall thickness in a slicer. This sample measured files, triangle counts and browser rendering.
The extra $0.105 in this test bought a single GLB and a denser mesh. The next comparison should include conversion time, transfer size and cleanup work across several objects. Set the acceptance criteria first, then divide the total API charges by the number of assets that pass.
For a comparison where both routes return GLB, see TRELLIS vs TRELLIS.2. It uses two shared inputs to test geometry, materials and validation.
See the five-file Blender import test for the same two robot packages rendered in Cycles and a deliberately missing OBJ texture.
For the separate 2.0 routes, see the matched Mini and Mini Turbo test, which holds the input and texture settings fixed across two seed pairs.
For the exact image fields, see the Hunyuan 3.1 Pro multi-view API guide. It tests one case from several angles and shows what changed when the same left and right images were swapped.
Questions about Pro and Rapid
Can I select the same face count on both routes?
The current Pro model page exposes a target face count. Rapid’s schema does not expose a matching field. Use a Pro target close to the measured Rapid count, verify both downloaded meshes and disclose any difference in the final counts. That follow-up answers a different question from this default-settings comparison.
Does a clean GLB validator report guarantee the asset is ready to ship?
A clean report checks the file against glTF rules. The product still needs separate checks for hidden surfaces, scale, the byte budget and the renderer used in production. For an interactive scene, repeat the rendering check after any conversion or compression step.
Where does this fit in a Three.js project?
These routes generate an asset. A Three.js project still needs a scene, lights and a camera, plus a loader that matches the file. The Three.js scene case study shows a separate workflow for building the surrounding scene.
Found this useful? Share it